
Carving a three-dimensional pumpkin might seem scary at first, but two of Vancouver's master carvers say there's really nothing to be afraid of.
We spoke to pumpkin sculptors Bruce Waugh and Clive Cooper to give you a helping hand this Halloween.
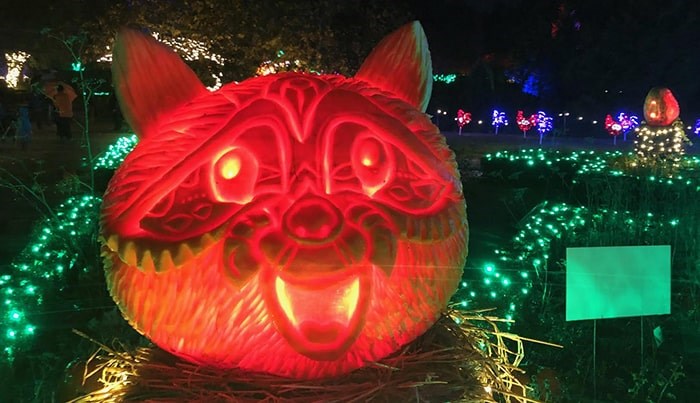 A raccoon pumpkin carving by Bruce Waugh at the 2019 VanDusen Glow in the Garden. Photo: Lindsay William-Ross
Waugh has been sculpting pumpkins, sand and ice for more than 30 years now, while Cooper has been carving pumpkins for more than 15 years as a part-time passion. Cooper has even showed off his talents on the U.S. reality TV show Halloween Wars. The duo have worked together on many projects together; you may have seen their incredible work at VanDusen’s magical Glow in the Garden event over the years.
Here’s what you need to know to have your family and friends saying “Oh my gourd!”
Pick the right pumpkin
Before you can start carving a pumpkin, you have to know how to pick the perfect one first.
Both sculptors suggest the best pumpkins for 3D carving are Atlantic Giants and Prize pumpkins. These pumpkins have thick flesh and allow you to carve deeper to create a 3D effect.
“If you go out pumpkin hunting, try to find a big stemmed pumpkin and that should dictate that it has thicker flesh to deal with,” says Waugh.
Cooper adds that you can still do a 3D pumpkin with a regular Jack-o-lantern; it just won’t be as elaborate.
When picking any pumpkin be sure to check that there are no rotten spots and make sure it’s quite firm. A firm pumpkin is going to last longer.
 One of Clive Cooper’s pumpkin carvings. Photo: Sparksfly design
Be inspired
Both artists say the inspiration for a pumpkin carving can come from a range of places — including colouring books, Halloween masks and simply just searching for images or things you’re interested in on the internet.
You can also look at the shape of your pumpkin and go from there. For example, an oval-shaped pumpkin makes a great canvas for an owl.
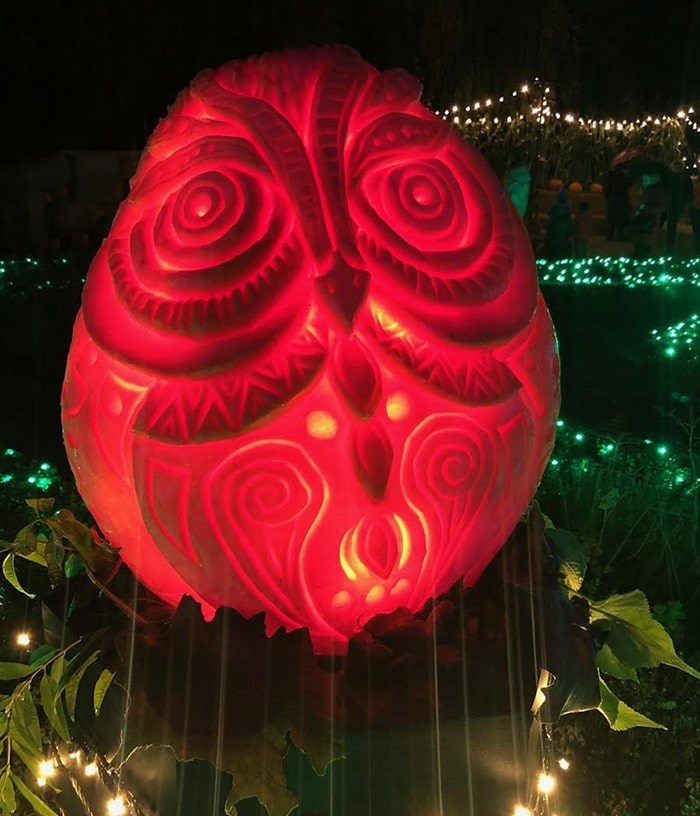 An owl carving by Bruce Waugh at the 2019 VanDusen Glow in the Garden. Photo: Lindsay William-Ross
Have the right tools and practice using them
Waugh says to master the 3D carving technique you have to have the right tools.
“In the art world, the tools are called ribbon or loop tools, usually used for carving clay. It’s just a band of wire in a pointed shape or a loop shape,” Waugh explains.
“Rather than just cut one side like a paring knife, they’ll take off two sides or a whole chunk at the same time. With a paring knife, you have to go back and forth to get the same effect.”
Learning how to use the loop tool is the key to 3D carving. You can use the tools to scrape and dig in detail at varying depths. Practice maneuvering the loop tools at different angles to find your desired effect.
“With a paring knife and the loop tools/ribbons tools – you can carve anything,” says Waugh.
Cooper adds that it’s worth looking at what you’ve got in your kitchen drawer. Vegetable peelers, ice cream scoops, citrus zesters and other small sharp knives can all come in handy.
QUICK TIPS
- If you’re new to this, we don’t want you to get hurt. Wear gloves to prevent cuts.
- Wash your pumpkin before carving.
- Wait till the end to gut your pumpkin, it will make it easier to carve in your 3D design - you don’t have to go through the top, you can make a small hole in back of the pumpkin after.
- Use a marker to map out your basic design.
- Scrape the skin off the pumpkin before starting to carve your 3D design.
Patience is key
Now that you have your pumpkin and your tools, there’s no turning back. Know that you’re in this for the long haul. There’s one big thing Waugh says you need to have to complete a 3D pumpkin successfully —“patience.”
“A lot of people can’t sit there for 3 hours and carve something, they just want to get in there and get it done,” says Waugh.
“Patience to get to the final result is huge.”
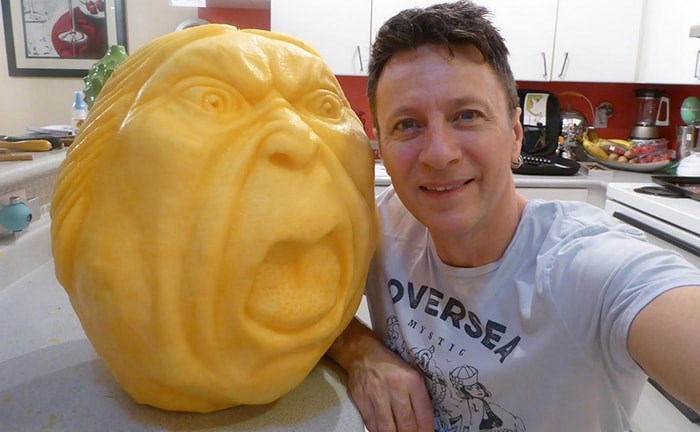 Clive Cooper with one of his pumpkin carvings. Photo: Sparksfly design
Don’t be afraid to carve a pumpkin
“People should not be afraid to carve a pumpkin, even if they say they can’t draw, because it doesn’t have the same skill set as drawing,” says Cooper.
“Don’t be afraid, even if you’re not artistic. Just get in there, take the skin off and scrape or carve away.”
A finishing touch
While both artists say they’ve tried everything to prolong the life of their pumpkin sculptures, inevitably they will deteriorate. However, Cooper suggests putting a little lemon water on the outside of the pumpkin once it’s complete, especially if you’re keeping it indoors. It will help it last a couple of extra days.
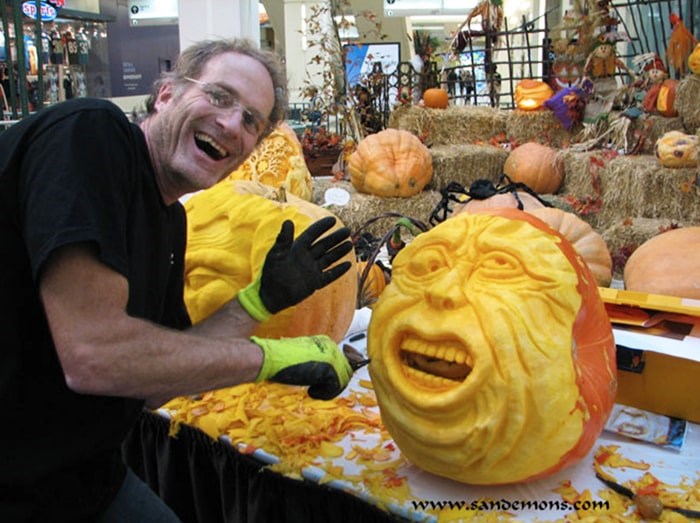 Vancouver man Bruce Waugh has been a sculptor for 30 years. Photo: sandemons.com
It’s all about fun
Last, but not least, remember carving a pumpkin is meant to be fun.
“It is temporary so you have to just enjoy the moment while you’re doing it,” says Waugh. You only get the pumpkins once a year so you have to just realize that this is it — enjoy the time.”
He encourages Vancouverites to have their own pumpkin-carving contest with neighbours or turn the experience into a pumpkin carving party.
“Have some beverages and carve a pumpkin!”


